17 December 2009

Creating a CD to Boot Linux Mint 8 from USB


Make a USB Boot CD for Linux Mint that can be used to boot Linux Mint 8 from a USB flash memory stick on computers with a BIOS that does not natively support booting from USB. The USB Boot CD created using the following process utilizes a grub bootloader to launch the vmlinuz kernel and initrd from the CD. The USB driver modules enable detection of the filesystem.squashfs on the USB device. The filesystem is then decompressed and Linux Mint 8 Proceeds to load.

USB Boot CD for Linux Mint 8 creation requirements:
  • Test PC with a BIOS that does not boot from USB
  • PC that does Boot from USB or can use the Live CD

  • Working CD Burner

  • USB flash drive with Linux Mint 8 preinstalled

Creating a CD to Boot Linux Mint 8 from USB

Note: We accomplished the following while running from a preinstalled Linux Mint 8 Live USB on a machine that does support booting from USB. This enabled us to free up the CD Burner to use to burn the final ISO.
  1. Insert your Linux Mint 8 Live USB or Live CD and restart your computer, booting from the CD or Live USB
  2. Open a Terminal (Menu > Terminal)
  3. Type sudo apt-get install grub
  4. Type mkdir -p mbcd/boot/grub
  5. Type cp /usr/lib/grub/i386-pc/stage2_eltorito mbcd/boot/grub
  6. Type gedit mbcd/boot/grub/menu.lst


    Add the following information to your menu.lst file and click save:

    title Start Linux MINT 8 from USB

    root (cd)

    kernel /boot/vmlinuz file=/cdrom/preseed/mint.seed boot=casper noprompt cdrom-detect/try-usb=true persistent

    initrd /boot/initrd.lz

    boot


  7. Type cp /cdrom/casper/vmlinuz ~/mbcd/boot
  8. Type sudo gedit /etc/initramfs-tools/modules


    Add the following lines to the modules file and click save:

    usbcore

    usb-storage

    uhci_hcd

    ohci_hcd

    ehci_hcd

    sd_mod

    scsi_mod


  9. Type sudo gedit /etc/initramfs-tools/initramfs.conf


    Add the following line to the bottom of the file and click save:

    WAIT=8


  10. Type sudo mkinitramfs -o mbcd/boot/initrd.lz
  11. Type mkisofs -R -b boot/grub/stage2_eltorito -no-emul-boot -boot-load-size 4 -boot-info-table -o mint8usbcd.iso mbcd
  12. Insert a blank CD and type brasero -i mint8usbcd.iso (to burn the ISO to a CD)

15 December 2009

Hiren's BootCD From USB Flash Drive


1) Connect a 256 MB or above flash drive.

2) Download and run USB Disk Storage Format (34 KB).


Step 1


3) Download and run grub4dos.zip (148 KB).


Step 2

4) Copy grldr and menu.lst into the usb drive.

5) Insert Hiren's BootCD in the CD Drive and Copy everything from CD to USB Flash Drive.

Latest View of the USB Flash Drive

Notes

- Make sure you set your computer to boot from USB Flash Drive
To Enter the BIOS press the "Del" button on your keyboard. Alternatives are "F1", "F2", "Insert", and "F10". Some PC's BIOS might even require a different key to be pressed. Commonly a PC will show a message like "Press [Del] to enter Setup" to indicate that you need to press the "Del" key. Some AMI BIOS require you to enable the option "USB Keyboard Legacy support"!
For AMI BIOS:
  • Go to "Feature Setup". "Enable" these options: "USB Function Support",
    "USB Function For DOS" and "ThumbDrive for DOS". Go to "Advanced Setup".
    Set the "1st Boot Device" to "USB RMD-FDD".
    Reboot the PC and it now should boot from the Usb Stick.

  • Go to "USB Mass Storage Device Configuration". Select "Emulation Type"
    and set it to "Harddisk". Go to the "Boot Menu" and set the "1st boot device" to "USB-Stick". Exit the BIOS, saving the changes.
    you can try "Emulation Type" to "Floppy" or "Forced FDD".
For PHOENIX/AWARD BIOS:
  • Go to "Advanced BIOS Features". Go to the "1st Boot device" and set it to "USB-ZIP".
- If you get GRLDR error then use syslinux to boot grub4dos (132 KB).

09 December 2009

Wine Runs Windows Applications

[The Beginning Of Wine]


The project was started in 1993 with to objective to run Windows 3.1 programs on Linux. Subsequently, versions for other Unix operating systems have been developed. The original coordinator of the project, Bob Amstadt, handed the project over to Alexandre Julliard a year later. Alexandre has been leading the development efforts ever since.

[The Goal]

Develop a "translation layer" for Linux and other POSIX compatible operating systems that enables users to run native Microsoft Windows applications on those operating systems.

[Translation Layer]

This translation layer is a software package that "emulates" the Microsoft Windows API (Application Programming Interface), but the developers emphasize that it is not an emulator in the sense that it adds an extra software layer on top of the native operating system, which would add memory and computation overhead and negatively affect performance. Instead Wine provides alternative DDLs (Dynamic Link Libraries) that are needed to run the applications. These are native software components that, depending on their implementation, can be just as efficient or more efficient than their Windows counterparts. That is why some MS Windows applications run faster on Linux than on Windows.

 [How Well Wine Works]

Not all of them work perfectly, but most commonly used Windows Applications run quite well, such as the following software packages and games: Microsoft Office 97, 2000, 2003, and XP, Microsoft Outlook, Microsoft Internet Explorer, Microsoft Project, Microsoft Visio, Adobe Photoshop, Quicken, Quicktime, iTunes, Windows Media Player 6.4, Lotus Notes 5.0 and 6.5.1, Silkroad Online 1.x, Half-Life 2 Retail, Half-Life Counter-Strike 1.6, and Battlefield 1942 1.6.
After installing Wine, Windows applications can be installed by placing the CD in the CD drive, opening a shell window, navigating to the CD directory containing the installation executable, and entering "wine setup.exe", if setup.exe is the installation program.

[How Exectly Wine Works]

When executing programs in Wine, the user can choose between the "desktop-in-a-box" mode and mixable windows. Wine supports both DirectX and OpenGL games. Support for Direct3D is limited. There is also a Wine API that allows programmers to write software that runs is source and binary compatible with Win32 code.

08 December 2009

Teknik Installasi IE6 & IE7 Dalam Platform Linux (Ubuntu)

1. Pergi Ke System > Administration > Synaptic Package Manager.

2.  Pergi Ke Search. Taip cabextract & klik Search. Click & Mark for Installation.

3.  Taip wine & klik Search. Click & Mark for Installation.

4. Klik Apply.

5. Download ies4linux.

6. Buka Terminal dalam folder ies4linux, taip tar zxvf ies4linux-2.99.0.tar.gz

7. Kemudian, masuk ke dalam folder dengan menaip cd ies4linux.

8. Untuk installasi, taip dalam terminal iatu ./ies4linux.


9. Klik & teruskan prosedur sehingga habis. Klik OK untuk tamatkan installasi.

10. Untuk membuka Internet Explorer dalam linux anda, taip "ie6" atau "ie7" dalam terminal.

04 December 2009

Laman Linux : Edisi Terbaru Berasaskan Linux:Debian


New developed Linux-based OS using Debian and originally developed from Ubuntu.

How To Install Wine On Debian-Linux

Debian-based distributions utilize a special tool for managing packages known as APT. APT is able to automagically install all of the needed dependencies for a software package, as well as keep the package up to date, by scanning what are known as APT repositories. Debian-based distributions have their own repositories of software that include Wine, however we keep our own repository of the latest available beta packages here for download.

This repository contains packages for i386 and amd64 architecture.
To install wine packages you can use two methods: add the repository or download a .deb package and manually install it, but first of all you have to remove older wine version. If you use the first method you'll have wine automatically upgraded by apt, otherwise you'll need to manually download and install every new version.

Remove old version

Open a terminal
su #to log as root
apt-get remove libwine wine #to remove outdated version of wine

Method 1: Add the repository

Open a terminal
su #to log as root
gedit /etc/apt/sources.list #to open repository file with a text editor (you can use gedit or another)
Add this line for Lenny: deb http://www.lamaresh.net/apt lenny main
Add this line for Squeeze: deb http://www.lamaresh.net/apt squeeze main
Add this line for Sid: deb http://www.lamaresh.net/apt sid main
Save and close sources.list
wget -O - http://www.lamaresh.net/apt/key.gpg | apt-key add - #to add gpg key
apt-get update #to update package list
apt-get install wine #to install latest wine version

Method 2: Download .deb and manually install it

Chose a .deb package from binary list and save it in your home directory
Open a terminal
cd ~ #to go to your home directory
su #to log as root
dpkg -i wine_1.1.xxx.deb #change xxx with your chosen package, this will install wine.

17 November 2009

Additional BIOS settings – USB booting tips and tricks

BIOS setup tips for USB Boot:
The system BIOS can be complicated to someone who is not yet familiar with all of the settings. Here are a few tips to help increase your chances of successfully booting a USB Linux system. If the flash memory stick fails to boot, go back into the system BIOS and try changing some of the following settings (Be sure to take note on any changes you have made). In addition, we have included some other tips to help achieve a successful boot.
  • Switch on or off USB keyboard support
  • Turn off Fast Boot
  • Disable USB 2.0 support (last resort, this will default to USB 1.1)
Other tips to help you Boot from USB:
These are some other suggestions to help ensure a successful USB Linux Boot:
  • Unplug USB hubs and extensions (these may draw from the current needed to wake your USB device)
  • Try using a different USB port. (some frontal ports may not be fully supportive)
  • Unplug additional USB devices. (I've seen something as simple as an IPod halt a system boot)
  • Sometimes a USB drive may go undetected at startup. If your drive has an LED, ensure that it either flashes or remains solid during system post. If the drive does not respond, remove the drive, then power the system completely down for 15 seconds, reinsert the drive and try again.
  • Some laptops using a PCMCIA slot may have troubles booting. You may have to tell Linux to ignore PCMCIA during boot. You can do this in the syslinux.cfg file by simply adding "nopcmcia" to the default boot options or by using a cheatcode before boot.

Restore Your USB Key to it's original state

After having tooled around with a USB Linux version using your image overwritten or multi partitioned flash pen drive, you might find it necessary to revert it back to a single fat partition (restore the flash pen drive to it's original state) that can again be read by all computers. Windows users can follow the Windows instructions below to Restore a Flash Drive using the HP USB Format tool SP27608. For those working from Linux this task can easily be accomplished via the Linux Flash Drive Restoration tutorial that follows.

Restoring your USB key to it's original state via Windows:


  1. Download the HP USB Format tool


  2. Run the USB Format tool. Select your Device from the list, select your File system type, and click Start to format the drive:

  3. hp-usb-fomat-tool


  4. That's it, your USB flash drive should now be formatted in a singular partition just as it was from the factory


Restoring your USB key to it's original state using Linux:


A. First we need to delete the old partitions that remain on the USB key.


  1. Open a terminal and type sudo su

  2. Type fdisk -l and note your USB drive letter.

  3. Type fdisk /dev/sdx (replacing x with your drive letter)


  4. Type d to proceed to delete a partition

  5. Type 1 to select the 1st partition and press enter

  6. Type d to proceed to delete another partition (fdisk should automatically select the second partition)


B. Next we need to create the new partition.


  1. Type n to make a new partition

  2. Type p to make this partition primary and press enter

  3. Type 1 to make this the first partition and then press enter


  4. Press enter to accept the default first cylinder

  5. Press enter again to accept the default last cylinder

  6. Type w to write the new partition information to the USB key


  7. Type umount /dev/sdx (replacing x with your drive letter)


C. The last step is to create the fat filesystem.


  1. Type mkfs.vfat -F 16 /dev/sdx1 (replacing x with your USB key drive letter)


That's it, you should now have a restored USB key with a single fat 16 partition that can be read from any computer.

Boot Multiple ISO from USB (MultiBoot USB)

How to Boot Multiple ISO from USB and create a Multiboot USB. This is a followup of our previous tutorial Boot ISO from USB. Please note that you will need a large USB device to be able to support every bootable ISO in the menu. I will update and add more bootable ISO files to the list as I find the time to test them.

MultiBoot USB Menu (You simply select an ISO to boot from USB)


Grub Menu - Available ISOs to Boot from USB


Basic Essentials to create a Multi ISO Boot USB Flash Drive
  • 4GB+ USB Flash Drive

  • PC that can boot from USB

  • Windows host to create the Bootable USB

  • BootMyISOs.exe

  • Your select ISO Files

This process will currently enable you to do the following:

Boot Ubuntu 9.10 ISO from USB

Boot Xubuntu 9.10 ISO from USB

Boot Kubuntu 9.10 ISO from USB

Boot Parted Magic 4.5 ISO from USB

Boot DSL 4.4.10 initrd ISO from USB

Boot Ultimate Boot 4.11 CD (UBCD) ISO from USB

Boot SliTaz Linux 2.0 ISO from USB

Boot OphCrack XP from USB

Boot OphCrack Vista ISO from USB


How to Boot Multiple ISO Files from USB


  1. Download and run BootMyISOs.exe, a BootMyISOs folder is created on your PC

  2. Run START.bat from the BootMyISOs folder and follow the onscreen instruction


  3. Download the ISO files you want to boot (links provided below) and copy the ISO files to the root of your USB Flash Drive

  4. Restart your PC booting from the USB device

  5. Select the ISO you want to Boot from the Menu and enjoy!


That's all there is to it. You should now be booting your favorite ISO files from your Multi-Boot USB device!


The ISO Download Links


These are the ISO files that correspond to each item listed in the Menu. Simply download the ISO(s) you want to run and copy them to the root of your USB Flash Drive.


Ubuntu 9.10 Torrent (use a Torrent client to get the ISO)

Xubuntu 9.10 Torrent (use a Torrent client to get the ISO)

Kubuntu 9.10 Torrent (use a Torrent client to get the ISO)

Parted Magic Zip/ISO (unzip to obtain the ISO)

DSL 4.4.10 Torrent (use a Torrent client to get the ISO)

Ultimate Boot CD Torrent (use a Torrent client to get the ISO)

SliTaz Linux 2.0 ISO

OphCrack XP 2.31 ISO

OphCrack Vista 2.31 ISO

Recommended USB Linux flash drives

Recommended USB Flash Pen Drives for Portable Linux installation:

  • SanDisk – Cruzer Micro 128M-2G

  • RIDATA – Ritek Mini Spin 128M-2G

  • OCZ – Rally2 (Old Style) 128M-2G

  • OCZ – Mini Kart 128M-1-2G

  • PQI – PQI i810 1-2G

  • PNY – Attache 1-2G

Find complete comprehensive reviews of USB flashdrives that are compatible with Linux at http://pendrivereviews.com


Testing your system for USB boot compatibility

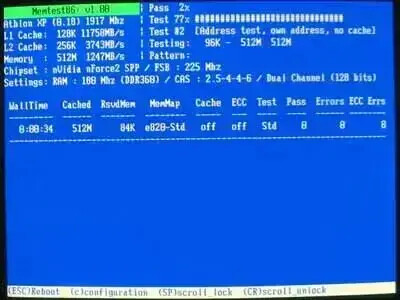
The tutorial will enable a user to check if a computer system can boot from a USB device and ultimately help determine if the computer can boot a Linux version from USB. In most cases if the test is successful, you should have no problem running Linux portably. In addition to testing your pc for USB Linux boot capability, the "Memtest86" system memory diagnostics program that is included, allows the user to scan their system memory for errors by simply booting memtest from a USB device or flash drive.

Basic USB Boot Test Essentials:

  • USB flash device


  • USBTest.zip (includes Memtest, Syslinux and a custom batch file)


Installing Memtest on USB to test for USB Boot compatibility:


The following explains how to install Memtest on a USB device and further run Memtest from USB. Enabling us to test whether a system can boot from USB.


  1. Download the USBTest.zip and extract the contents of the zip to your flash drive. See Screenshot below:

  2. Contents of the extracted zip on drive


  3. Navigate to your flash drive and click makeboot.bat (to make the drive bootable)


  4. Reboot your computer and set your system BIOS to boot from USB-ZIP or USB-HDD. Or, set the hard disk boot priority to boot from the USB stick if your BIOS lists the device as a hard drive

  5. Save your BIOS settings.


Upon reboot, you should have a successful launch of Memtest from the USB flash drive:


Memtest86 Screenshot:


Memtest Screenshot


This test concludes that your system is capable of booting from a USB device using Syslinux and it should be possible to run Linux from USB.


Notes: After booting Memtest from USB, it is not necessary to complete the system memory test. However, if you have the time, it can't hurt to ensure that your computers memory is in good shape.


This test does not guarantee that your computer hardware is supported with a particular Linux distribution. It is possible to pass this test and still have problems booting Linux. For example: A Video Card driver may not be available by default with a particular Linux distribution which could leave you at the shell after boot.

Boot any Linux ISO from USB in Windows

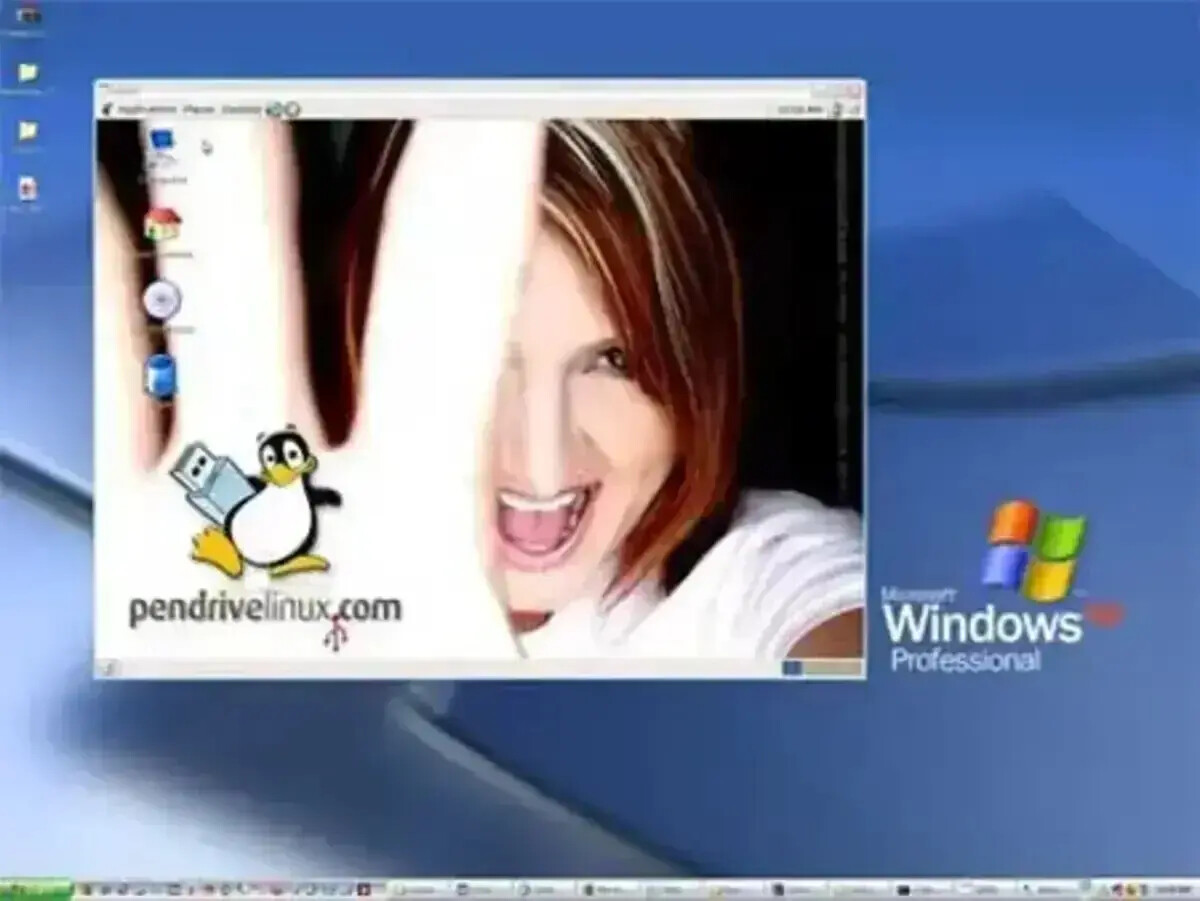
Pendrivelinux running on Windows via Qemu Screenshot:


Portable Pendrivelinux Screenshot


Qemu Home Page: Qemu.org


Requirements:


  • Windows computer

  • USB portable storage device

  • Your favorite Live Linux CD image (ISO)

  • Custom StartLinux.exe including Qemu, Kqemu files


The Process:


  1. Create a directory on your USB device named QStart

  2. Download the self extracting 7-z StartLinux.exe file

  3. Run StartLinux.exe and extract the contained files to the QStart directory on your flash drive


  4. Download your favorite Linux CD (ISO) Image and copy it to the QStart directory on the flash drive

  5. Double click the StartLinux.bat file to boot linux directly from the portable flash device


Note that Qemu boot is slightly slower than booting directly from the USB flash drive or CD at startup. However, it's nice to be able to run Linux from the device even if the computer doesn't support USB boot. This configuration reserves 256MB of system memory for the virtual Linux operating environment. If you wish to increase or decrease this capacity, edit the -m value on the last line of the StartLinux.bat file.


Update 9/24/07: Now Works on Windows Vista hosts

Install Ultimate Boot CD (UBCD) to a Flash Drive in Windows

USB Ultimate Boot CD Screenshot:


USB UBCD


Distribution Home Page: http://www.ultimatebootcd.com


Minimum Flash Drive Capacity: 256MB+


Persistent Feature: No


USB Ultimate Boot CD (UBCD) prerequisites:


  • UBCDfix2.exe (does the USB conversion)

  • UBCD ISO

  • USB flash drive (fat32 formatted)


  • A windows host PC to perform the build


Simple USB Ultimate Boot CD How-To:


  1. Download and launch UBCDfix2.exe, a UBCD folder is created

  2. Download the UBCD ISO and move to your UBCD folder


  3. From the UBCD folder, click fixubcd2.bat and follow the onscreen instructions

  4. Reboot and set your computer to Boot from the USB device

  5. On next launch, you should be booting Ultimate Boot CD from your USB stick


Update 05/19/08: The script now moves the extracted files to the flash drive automatically. It has been tested to work in both XP and Vista.

Install Ubuntu 9.10 to a Flash Drive from Windows

Create a Ubuntu 9.10 Live USB Flash Drive from Windows: In the following tutorial, we show you how we installed Ubuntu 9.10 (Karmic Koala), a product of Canonical Ltd to a USB Flash Drive using a Windows to perform the install. Upon completion, Ubuntu 9.10 can be natively booted and then run directly from your portable device. Note that this installation process does utilize the casper-rw loopback image file for persistently saving and restoring changes on subsequent boots.

Screenshot of Ubuntu 9.10 (Karmic Koala)


Desktop Screenshot of Ubuntu 9.10


Distribution Home Page: ubuntu.com


Minimum Flash Drive Capacity: 2GB


Persistent Feature: Yes


Ubuntu 9.10 Live USB Flash Drive Creation Essentials


  • Windows PC to perform conversion

  • Ubuntu 9.10 ISO


  • 2GB or larger USB flash drive (fat32 formatted)

  • USB-Installer-U910p.exe (contains the files to do the conversion)


Ubuntu 9.10 Live USB Flash Drive Creation tutorial


  1. Download and launch USB Installer-U910.exe, extracting to your PC. A "USB Installer For Ubuntu 910" folder is automatically created


  2. Download this torrent and proceed to download Ubuntu 9.10 ISO using your favorite torrent client.

  3. Place the Ubuntu 9.10 ISO in the USB Installer for Ubuntu 910 folder on your computer

  4. From the USB Installer for Ubuntu 910 folder on your PC, click START.bat and follow the on screen instructions


  5. Once the script has finished, restart your PC and set your BIOS or Boot Menu to boot from the USB device, save your changes and reboot


If all goes well, you should now be booting from your own personal Live Ubuntu 9.10 USB that allows you to save most of your changes persistently.


Persistent size: The default casper-rw loop file that becomes the partition for saving changes is only 1GB.


Update: The script now allows you to create a 1GB to 4GB casper-rw file.


However, If you prefer to resize your casper-rw disk block image file and use more USB storage space for saving changes post install, you can resize casper-rw from Windows or resize casper-rw using Linux

How to Boot an ISO from a USB Flash Drive

  1. Download and run BootMyISO.exe, a BootMyISO folder is created

  2. Run BootMyISO.bat from the BootMyISO folder and follow the onscreen instructions


  3. Restart your PC booting from the USB device and select Memtest86+ from the Menu


If all went well, you should be running the Memtest86+ ISO directly from your USB device.


Boot a Parted Magic ISO from your USB Flash Drive


Using a text editor like notepad++ you can open and edit the menu.lst file found on the root of your USB device. For Example;


  1. Uncomment (remove the # from the Parted Magic Section)

    # title Parted Magic 4.5 ISO Boot

    # find –set-root /pmagic-4.5.iso

    # map /pmagic-4.5.iso (hd32)


    # map –hook

    # root (hd32)

    # chainloader (hd32)


  2. Once you have removed the comments, save the menu.lst file


  3. Download the "pmagic-4.5.iso.zip" and unzip the file

  4. copy pmagic-4.5.iso to your Flash Drive

  5. Restart your PC again and you should now have the menu option Parted Magic ISO Boot


Boot another ISO from your USB Flash Drive


Notice that there is a third section in menu.lst that can be used to test Boot other ISO's from USB.


  1. Simply copy the ISO you want to Boot to your USB device

  2. Uncomment (remove the # from the Test ISO section)

    # title Test ISO

    # find –set-root /testname.iso


    # map /testname.iso (hd32)

    # map –hook

    # root (hd32)

    # chainloader (hd32)


  3. Change testname.iso to the name of the ISO you copied to the USB device

  4. Restart your PC and choose the Test ISO boot option to see if your ISO boots from USB.

Make a Linux Mint 7 Flash Drive using USB Creator

Linux Mint 7 Desktop Screenshot

Linux Mint 7 Desktop Screenshot


Distribution Home Page: LinuxMint.com


Minimum Flash Drive Capacity: 1GB


Persistent Feature: Yes


Essentials for creating a Linux Mint 7 Flash Drive


  • LinuxMint-7 CD

  • Working CD/DVD Drive

  • Working internet connection


  • 1GB USB flash drive (2GB+ recommended)


Make a Linux Mint 7 Flash Drive using USB Creator


  1. Download the LinuxMint-7 torrent and proceed to download the ISO with a torrent client. Finally, burn the ISO to a CD

  2. Restart your computer, booting from the LinuxMint 7 CD

  3. Once your up and running, insert your USB flash drive

  4. Open a Terminal and type or copy and paste the following commands:

    • sudo su


    • apt-get install usb-creator

    • usb-creator


  5. (1) Select the USB disk to use, (2) Select the option Stored in reserved extra space and adjust the slider to set how much space to use for persistence, (3) Click Make Startup Disk: Make a Mint7 USB Disk

  6. A progress bar will appear indicating the percentage completed


  7. Download this custom Linux Mint 7 syslinux.cfg file and copy it to the syslinux directory on your flash drive (overwriting the original)

  8. Remove the CD, restart your computer and set your BIOS to boot from the USB device

Install Linux Mint 7 to a Flash Drive in Windows

Create a USB Linux Mint 7 persistent flash drive using Windows. In the following tutorial, we show you how we used Windows and our custom script to create a Portable Linux Mint 7 USB flash drive. Linux Mint 7 Gloria is based on Ubuntu 9.04 Jaunty Jackalope and is compatible with it's current repositories. Originally launched as a variant of Ubuntu with integrated media codecs, Linux Mint has developed into an elegant Linux distribution. Currently maintained by Clement Lefebvre, more information about Linux Mint can be found at the Official Linux Mint site.


Note: The persistent feature works just as it does in Ubuntu, allowing you to save and restore most of your changes.


Linux Mint 7 Gloria Screenshot:


USB Linux Mint Gloria Screenshot


Distribution Home Page: LinuxMint.com


Minimum Flash Drive Capacity: 2GB


Persistent Feature: Yes


USB Linux Mint 7 Flash Drive creation essentials:


  • 2GB or Larger USB Flash Drive (Fat32 formatted)


  • Linux Mint 7 Gloria ISO


  • fixmint7.exe


Linux Mint Flash Drive creation process:


  1. Download and run USBMint7.exe extracting the contents to your desktop, a USBMint folder is created


  2. Download the LinuxMint-7.iso and copy it to the USBMint folder on your desktop

  3. From the USBMint folder on your desktop, run fixmint.bat and follow the onscreen instructions


  4. Reboot your PC and set your system BIOS or Boot Menu to boot from the USB device, save your changes and reboot booting from the USB memory stick


Upon reboot, you should have a successful launch of USB Linux Mint (Portable Linux Mint 7) from your flash memory stick.


Persistence size: The default casper-rw loop file that becomes the partition for saving changes is only 1GB. If you have room and would prefer to use more space for saving changes you can resize casper-rw from Windows.

Persistent Linux - Data Storage Structure

Persistence – in computer science refers to the characteristic of data that outlives the execution of the program that created it. Without this capability, data only exists in RAM, and will be lost when the memory loses power, such as on computer shutdown."

What does Persistence mean for USB Linux Users?

For USB Linux users, a persistent Linux install is one that allows it's user to save data changes back to the USB storage device instead of leaving the information in system RAM. This data can then be recovered and used again on subsequent boots, even when booting from different machines. Typically a separate Persistent storage space is used in conjunction with a compressed Live Linux OS.

Advantages and disadvantages of using the persistence feature?

Advantages:

1. More available storage space – Since the Live Linux Operating System (OS) is compressed with most persistent installs, the entire operating system takes up less space. Enabling operating systems that usually require gigabytes of space to be condensed into storage capacities less than 1GB in many cases.
2. Less wear on the USB device – Since most of the operating system is loaded into system memory and only the changes are written back to the USB storage device, the read/write cycles decrease, prolonging your USB flash drives life.
3. Independence – The storage space used for persistent changes is independent of and separated from the OS, allowing users to backup or recover persistent changes on the fly without reinstalling and rebuilding an entire operating system. The operating system should still continue to function like a fresh install if the persistence feature is disabled.
4. Portability – Bookmarks, settings, system preferences, customizations and file downloads can in most cases be stored and retrieved when booting from different or multiple machines.

Disadvantages:

1. Limited Protection – Persistent Data is left unencrypted in most cases. Lose your drive, someone could steal and use your data.
2. Persistent data is uncompressed – Although the Live OS can be compressed, the persistent data is left uncompressed making it very easy to run out of storage space quickly.
3. Some changes are not saved persistently – In most cases, further modification is required to enable graphical card settings, network card settings and users to be saved.

28 October 2009

Installation

In order to install GRUB as your boot loader, you need to first install the GRUB system and utilities under your UNIX-like operating system (see Obtaining and Building GRUB). You can do this either from the source tarball, or as a package for your OS.

After you have done that, you need to install the boot loader on a drive (floppy or hard disk). There are two ways of doing that - either using the utility grub-install (see Invoking grub-install) on a UNIX-like OS, or by running GRUB itself from a floppy. These are quite similar, however the utility might probe a wrong BIOS drive, so you should be careful.

Also, if you install GRUB on a UNIX-like OS, please make sure that you have an emergency boot disk ready, so that you can rescue your computer if, by any chance, your hard drive becomes unusable (unbootable).

GRUB comes with boot images, which are normally put in the directory /usr/lib/grub/i386-pc. If you do not use grub-install, then you need to copy the files stage1, stage2, and *stage1_5 to the directory /boot/grub, and run the grub-set-default (see Invoking grub-set-default) if you intend to use `default saved' (see default) in your configuration file. Hereafter, the directory where GRUB images are initially placed (normally /usr/lib/grub/i386-pc) will be called the image directory, and the directory where the boot loader needs to find them (usually /boot/grub) will be called the boot directory.

The role of a boot loader

The following is a quotation from Gordon Matzigkeit, a GRUB fanatic:

Some people like to acknowledge both the operating system and kernel when they talk about their computers, so they might say they use “GNU/Linux” or “GNU/Hurd”. Other people seem to think that the kernel is the most important part of the system, so they like to call their GNU operating systems “Linux systems.”

I, personally, believe that this is a grave injustice, because the boot loader is the most important software of all. I used to refer to the above systems as either “LILO”1 or “GRUB” systems.

Unfortunately, nobody ever understood what I was talking about; now I just use the word “GNU” as a pseudonym for GRUB.

So, if you ever hear people talking about their alleged “GNU” systems, remember that they are actually paying homage to the best boot loader around... GRUB!

We, the GRUB maintainers, do not (usually) encourage Gordon's level of fanaticism, but it helps to remember that boot loaders deserve recognition. We hope that you enjoy using GNU GRUB as much as we did writing it.

GRUB features

The primary requirement for GRUB is that it be compliant with the Multiboot Specification, which is described in Multiboot Specification.

The other goals, listed in approximate order of importance, are:

* Basic functions must be straightforward for end-users.
* Rich functionality to support kernel experts and designers.
* Backward compatibility for booting FreeBSD, NetBSD, OpenBSD, and Linux. Proprietary kernels (such as DOS, Windows NT, and OS/2) are supported via a chain-loading function.

Except for specific compatibility modes (chain-loading and the Linux piggyback format), all kernels will be started in much the same state as in the Multiboot Specification. Only kernels loaded at 1 megabyte or above are presently supported. Any attempt to load below that boundary will simply result in immediate failure and an error message reporting the problem.

In addition to the requirements above, GRUB has the following features (note that the Multiboot Specification doesn't require all the features that GRUB supports):

Recognize multiple executable formats
Support many of the a.out variants plus ELF. Symbol tables are also loaded.
Support non-Multiboot kernels
Support many of the various free 32-bit kernels that lack Multiboot compliance (primarily FreeBSD, NetBSD, OpenBSD, and Linux). Chain-loading of other boot loaders is also supported.
Load multiples modules
Fully support the Multiboot feature of loading multiple modules.
Load a configuration file
Support a human-readable text configuration file with preset boot commands. You can also load another configuration file dynamically and embed a preset configuration file in a GRUB image file. The list of commands (see Commands) are a superset of those supported on the command-line. An example configuration file is provided in Configuration.
Provide a menu interface
A menu interface listing preset boot commands, with a programmable timeout, is available. There is no fixed limit on the number of boot entries, and the current implementation has space for several hundred.
Have a flexible command-line interface
A fairly flexible command-line interface, accessible from the menu, is available to edit any preset commands, or write a new boot command set from scratch. If no configuration file is present, GRUB drops to the command-line.

The list of commands (see Commands) are a subset of those supported for configuration files. Editing commands closely resembles the Bash command-line (see Bash), with -completion of commands, devices, partitions, and files in a directory depending on context.
Support multiple filesystem types
Support multiple filesystem types transparently, plus a useful explicit blocklist notation. The currently supported filesystem types are BSD FFS, DOS FAT16 and FAT32, Minix fs, Linux ext2fs, ReiserFS, JFS, XFS, and VSTa fs. See Filesystem, for more information.
Support automatic decompression
Can decompress files which were compressed by gzip. This function is both automatic and transparent to the user (i.e. all functions operate upon the uncompressed contents of the specified files). This greatly reduces a file size and loading time, a particularly great benefit for floppies.1

It is conceivable that some kernel modules should be loaded in a compressed state, so a different module-loading command can be specified to avoid uncompressing the modules.
Access data on any installed device
Support reading data from any or all floppies or hard disk(s) recognized by the BIOS, independent of the setting of the root device.
Be independent of drive geometry translations
Unlike many other boot loaders, GRUB makes the particular drive translation irrelevant. A drive installed and running with one translation may be converted to another translation without any adverse effects or changes in GRUB's configuration.
Detect all installed ram
GRUB can generally find all the installed ram on a PC-compatible machine. It uses an advanced BIOS query technique for finding all memory regions. As described on the Multiboot Specification (see Multiboot Specification), not all kernels make use of this information, but GRUB provides it for those who do.
Support Logical Block Address mode
In traditional disk calls (called CHS mode), there is a geometry translation problem, that is, the BIOS cannot access over 1024 cylinders, so the accessible space is limited to at least 508 MB and to at most 8GB. GRUB can't universally solve this problem, as there is no standard interface used in all machines. However, several newer machines have the new interface, Logical Block Address (LBA) mode. GRUB automatically detects if LBA mode is available and uses it if available. In LBA mode, GRUB can access the entire disk.
Support network booting
GRUB is basically a disk-based boot loader but also has network support. You can load OS images from a network by using the TFTP protocol.
Support remote terminals
To support computers with no console, GRUB provides remote terminal support, so that you can control GRUB from a remote host. Only serial terminal support is implemented at the moment.

Introduction to GRUB

Overview

Briefly, a boot loader is the first software program that runs when a computer starts. It is responsible for loading and transferring control to an operating system kernel software (such as Linux or GNU Mach). The kernel, in turn, initializes the rest of the operating system (e.g. a GNU system).

GNU GRUB is a very powerful boot loader, which can load a wide variety of free operating systems, as well as proprietary operating systems with chain-loading1. GRUB is designed to address the complexity of booting a personal computer; both the program and this manual are tightly bound to that computer platform, although porting to other platforms may be addressed in the future.

One of the important features in GRUB is flexibility; GRUB understands filesystems and kernel executable formats, so you can load an arbitrary operating system the way you like, without recording the physical position of your kernel on the disk. Thus you can load the kernel just by specifying its file name and the drive and partition where the kernel resides.

When booting with GRUB, you can use either a command-line interface (see Command-line interface), or a menu interface (see Menu interface). Using the command-line interface, you type the drive specification and file name of the kernel manually. In the menu interface, you just select an OS using the arrow keys. The menu is based on a configuration file which you prepare beforehand (see Configuration). While in the menu, you can switch to the command-line mode, and vice-versa. You can even edit menu entries before using them.

In the following chapters, you will learn how to specify a drive, a partition, and a file name (see Naming convention) to GRUB, how to install GRUB on your drive (see Installation), and how to boot your OSes (see Booting), step by step.

Besides the GRUB boot loader itself, there is a grub shell grub (see Invoking the grub shell) which can be run when you are in your operating system. It emulates the boot loader and can be used for installing the boot loader.

22 June 2009

HTML Elements

HTML Elements


An HTML element is everything from the start tag to the end tag:


Start tag *Element contentEnd tag *
<p>This is a paragraph</p>
<a href="default.htm" >This is a link</a>
<br />  

* The start tag is often called the opening tag. The end tag is often called the closing tag.


HTML Element Syntax


  • An HTML element starts with a start tag / opening tag

  • An HTML element ends with an end tag / closing tag

  • The element content is everything between the start and the end tag


  • Some HTML elements have empty content

  • Empty elements are closed in the start tag

  • Most HTML elements can have attributes

What is HTML?

What is HTML?

HTML is a language for describing web pages.


  • HTML stands for Hyper Text Markup Language
  • HTML is not a programming language,
    it is a markup language


  • A markup language is a set of markup
    tags
  • HTML uses markup tags to describe web pages


HTML Tags

HTML markup tags are usually called HTML tags


  • HTML tags are keywords surrounded by angle brackets like <html>
  • HTML tags normally come in pairs like <b> and </b>
  • The first tag in a pair is the start tag, the
    second tag is the end tag


  • Start and end tags are also called opening tags and closing
    tags
    .


HTML Documents = Web Pages


  • HTML documents describe web pages

  • HTML documents contain HTML tags and plain text


  • HTML documents are also called web pages

The purpose of a web browser (like Internet Explorer or Firefox) is to read HTML
documents and display them as web pages. The browser does not display the HTML tags,
but uses the tags to
interpret the content of the page:


<html>

<body>


<h1>My First Heading</h1>


<p>My first paragraph</p>


</body>

</html>


Example Explained


  • The text between <html> and </html> describes the web page


  • The text between <body> and </body> is the visible page
    content

  • The text between <h1> and </h1> is displayed as a heading


  • The text between <p> and </p> is displayed as a paragraph

02 February 2009

Computer Hardware Link's

Processors (CPUs)

General Processor Information

Intel

Intel Itanium (IA64, Merced)

Intel Xeon

Intel Pentium 4

Intel Celeron

Intel Pentium III

Intel Pentium II

Intel Pentium Pro (P6)

Intel Pentium MMX (P55C)

Intel Pentium (P5, P54C)

Intel 486

Intel 386


AMD

AMD Athlon (K7)

AMD Duron

AMD Mobile

AMD K6-3

AMD K6-2

AMD K6

AMD K5

AMD 3DNow!


Transmeta


Via Technologies


PowerPC


Other Processor Architectures


Overclocking

CPU Cooling

Motherboards

Motherboard Information

Motherboard Form Factors

Motherboard Manufacturers

Upgrading and Reparing PCs

BIOS

BIOS Vendors

BIOS Information

BIOS Related Specifications

BIOS Reprogramming

  • BadFlash.com (PC BIOS Reprogramming, Replacement, & Recovery)

Memory Storage

General Storage Information

Hard Disk

CD-ROM

CD-R (CD-Recordable) / CD-RW (CD-Read/Write)

DVD

Removable Storage

Floppy Drives

SCSI Information

RAID (Redundant Array of Inexpensive Disks)

Device Bay

Data Recovery

Storage Area Networks (SANs)

Other Related Information

Storage Manufacturers

Video

Graphics Cards, Video Cards

Monitors/Displays

MPEG (Moving PIcture Experts Group)

Color

Other Related Topics

Related Posts Plugin for WordPress, Blogger...